Kookmin University (KMU) Autonomous Driving Contest
2022.09.03
TL;DR : This project is the start of my autonomous driving studies. My main contributions are lane detection, camera calibration, and the mission manager.
Brief Overview
- High-Speed Racing: The model car must drive 3 laps counterclockwise on the track.
- Mission Performance Competition
- The model car must drive 1 lap counterclockwise on the track.
- The model car must complete each mission (parallel/vertical parking, tunnel, obstacle avoidance, traffic lights) installed on the track in sequence, and for each mission performed, the team will earn points.
- Final Score Calculation: The high-speed racing competition is scored based on the recorded time, while the mission performance competition is scored based on the total points.
Lane Detection
Preprocessing
We preprocessed the camera footage using OpenCV, then used a lane detection algorithm to determine the curvature of the lane and the direction of the vehicle. The preprocessing techniques used were; GrayScale, Blur, HLS, RGB Threshold, and Canny Edge. The biggest problem was the harsh light reflecting off the black tiles (the studio was indoors). In order to solve this, we preprocessed in the order of HLS→GrayScale→Canny Edge→Blur→BEV (Bird-Eye View), and tuned the hyperparameters using the rosbag footage of the indoor studio. This video shows the different steps of preprocessing done on the camera footage.
Lane Detection Algorithm
For the lane detection algorithm we used Mask Lane Detection, Sliding Window, and Hough Transformation. To minimize the computational load on the Jetson TX2, Mask Lane Detection represents lane information in binary and uses bitwise operations to detect the sections with the highest probability of lane presence. This video shows how the Mask Lane Detection algorithm works.
Camera Calibration

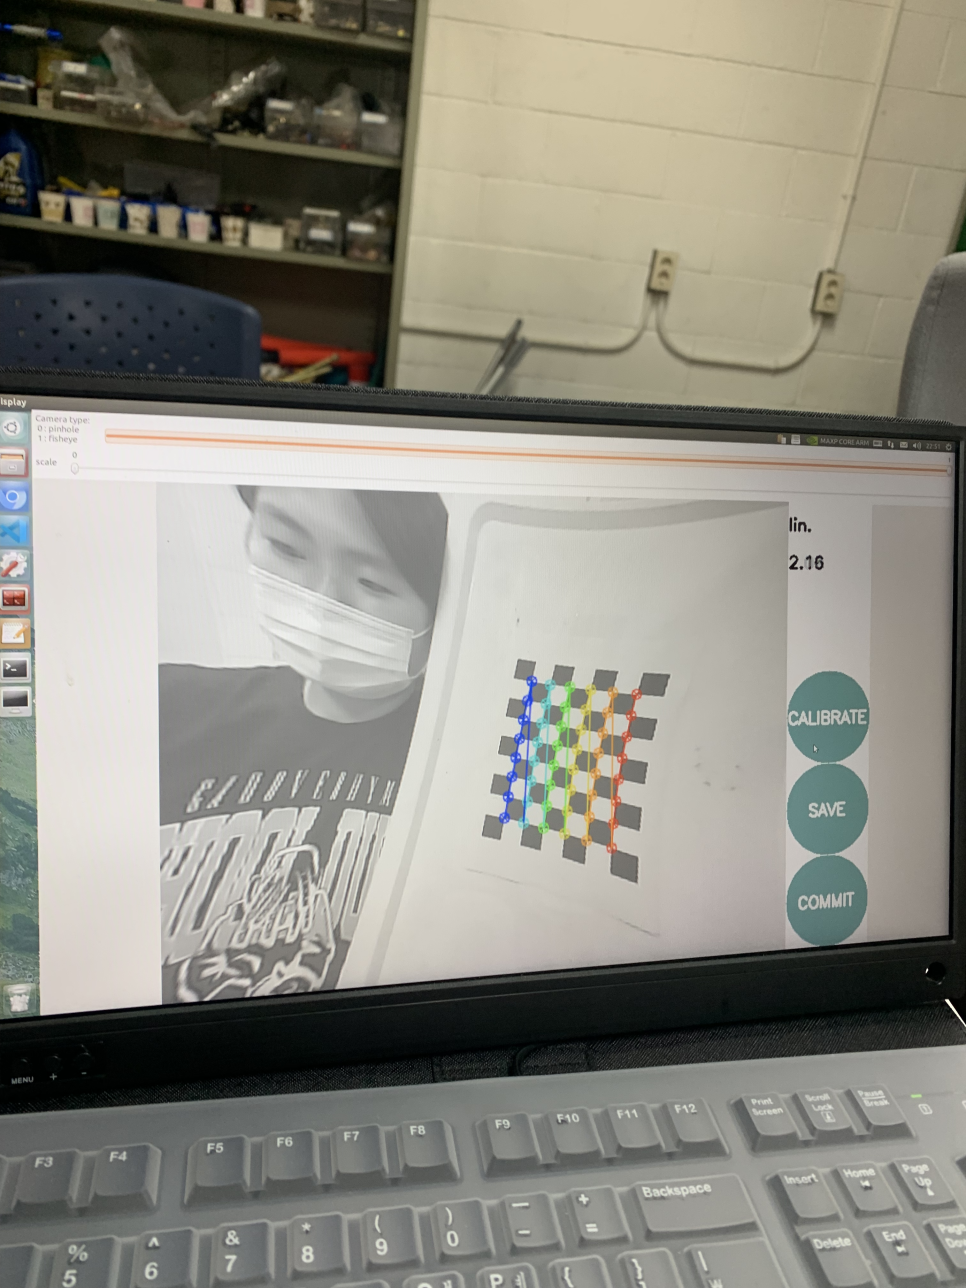
This picture pretty much sums up what camera calibration is. Generally, a checkerboard is used to measure the distortion and intrinsic parameters of a camera. By taking multiple images of the checkerboard from different angles, the calibration package calculates how much the lens distorts the image and corrects it.
The Mission Manager & The Database
The trickiest, but most intriguing part of the whole project. Like most self-driving projects, it really boils down to how we configure the main body of the code- that is, taking in the sensor information, distributing this info to the mission python files, checking whether each mission is complete, and so on and so forth. We had a ‘Mission Manager’- which orchestrated the execution of missions, and a ‘Database’- that controlled all sensor info flow throughout the project.
MissionManager
The MissionManager class manages a sequence of missions, which are instances of the Mission class. Here’s a summary of what it does:
- Initialization (
__init__method):- Initializes an empty dictionary missions to store mission objects.
- Sets db to the provided database object. -Initializes mission_keys as an empty list to store keys for the missions.
- Sets mission_idx and current_mission_key to None.
- Add Mission (
add_missionmethod):- Adds a mission to the missions dictionary if the key exists in mission_keys.
- If the key is not in mission_keys, it issues a warning and does not add the mission.
- Main Function (
mainmethod):- Retrieves the current mission using current_mission_key.
- xecutes the main function of the current mission, which presumably returns car_angle and car_speed.
- Checks if the current mission has ended using mission_end. If it has, it calls next_mission to proceed to the next mission.
- Returns car_angle and car_speed.
- Next Mission (
next_missionmethod):- Advances to the next mission if there are more missions to complete.
- If all missions are complete, it prints a message indicating the system will stop.
- Updates mission_idx and current_mission_key to point to the next mission in the sequence.
Overall, MissionManager orchestrates the execution of a series of missions, ensuring they are carried out in sequence and handling the transition from one mission to the next.
Database
Database sets up a ROS node to subscribe to various sensor data topics and stores the received data in a Database class. Here’s a summary of what it does:
- Initialization (
__init__method):- Initializes the ROS node.
- Subscribes to various sensor topics (/usb_cam/image_raw, imu, /scan, xycar_ultrasonic, ar_pose_marker, and /odom).
- Sets up a CvBridge for converting ROS image messages to OpenCV format.
- Initializes data storage attributes for each sensor.
- Callback Methods:
- img_callback: Processes incoming camera images and stores them.
- imu_callback: Processes IMU data and converts it to Euler angles.
- lidar_callback: Stores incoming LiDAR data.
- ultra_callback: Stores ultrasonic sensor data.
- ar_tag_callback: Stores AR tag poses.
- odom_callback: Converts and stores odometry data as yaw from the initial orientation.
- Main Execution:
- Creates an instance of the Database class with specific sensors enabled (camera, IMU, LiDAR, ultrasonic).
- Enters a loop that runs at 10 Hz, continuing until ROS is shutdown.
Overall, Database initializes a ROS node that listens to various sensor data topics, processes the incoming data through callback functions, and stores it in a Database class instance for further use (which in our case, would be mission python files).